It is true that nowadays many experienced riders even opt for self-launching their kite, but in difficult conditions or for not experts, assisted launch it is a must.
A good kitesurfer should also be a good assistant to others, especially helping not expert riders who can still make mistakes, but sometimes this doesn’t happen. Let’s see together how to help to launch the kite in the best way in case we encounter an inexperienced rider and, if you are that guy, you can read my previous post on how to carry out an assisted launch in safety as the pilot here.
* The first important role of a kite assistant is to check the lines and bridle system for the presence of any tangles or wrong lines connections. In that case, he should abort the launch, regardless of the indications of the pilot to continue. Checking the kite size according to the wind intensity and the rider's weight is also a very recommendable practice. If all is ok he can proceed in assisting the kiter to the launch.
** The second important thing we should check is the presence of people or obstacles downwind for a reasonable distance. This should definitely be done by the pilot, but inexperienced and excited riders may overlook crucial details and we should support them properly, even denying the launch in dangerous situations.
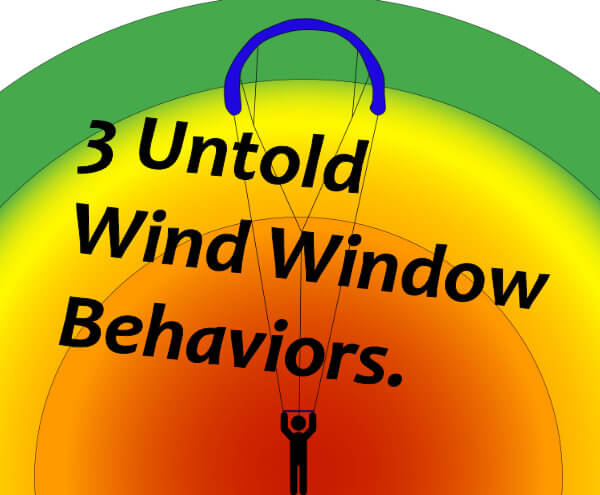
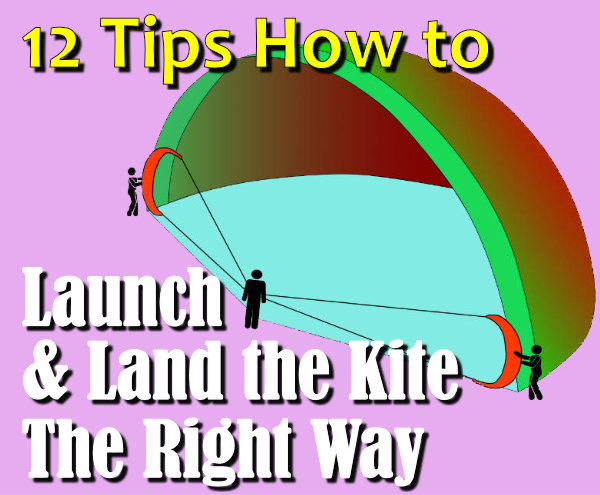
The well-known theory says we should launch the kite at the border of the wind window, keeping the kite high enough for the canopy not to touch the ground and holding the kite not to close to the wingtip, to avoid to make it too unstable and slip out of the hands:
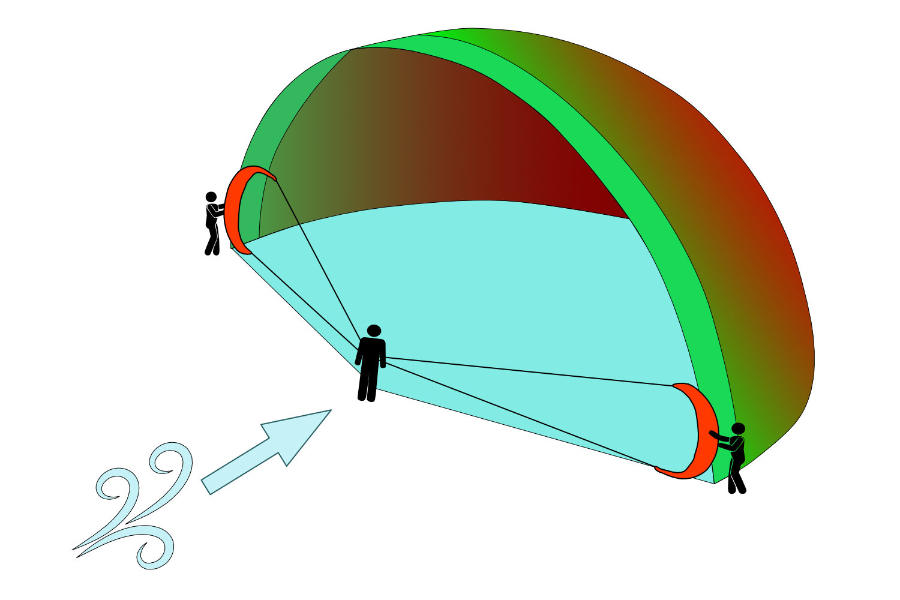
This is crucial because, if we miss the border, we can find ourselves in two different situations:
- launch the kite from the power zone (the red area of the window): we start experimenting with big pressure on the kite while trying to hold it and the pilot will have to face some unwanted power from the kite, while not yet ready to pilot it.
- launch the kite out of the wind window (upwind respect to the pilot position): there won’t be pressure on the internal side of the kite’s canopy to put in tension the lines. After its release, the kite will fall on the ground, it will possibly drift back or even roll until it will be deep in the power zone. At that point the lines’ tension will suddenly stop the kite, which will regain wind pressure on the canopy, resulting in a quick restart with great pull on the pilot.
The experienced kiter, when he is on the beach with someone’s kite in the hands, knows how to find the sweet spot of the border of the wind window. If the pilot is skilled and places himself in the correct position no action is needed from the assistant, but this skill is particularly important when the kitesurfer we are helping isn’t an expert and misplaces himself in relation to the kite and the wind window positions.
The method of the compass will help with that: It consists of keeping the kite lines in tension, moving along the circle they force us to follow, and observing the kite behavior.
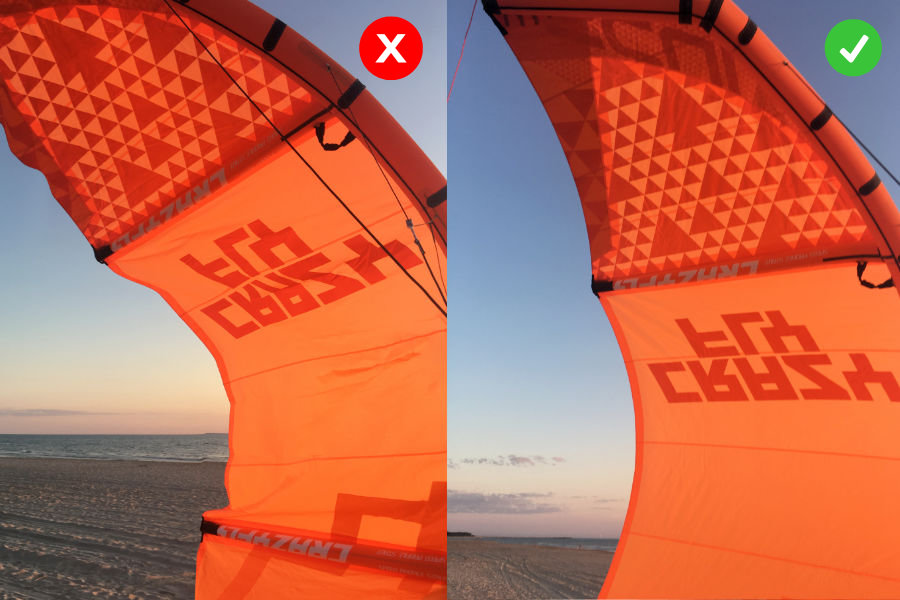
1. If we are out of the wind window close to being upwind to the kiter’s position, the kite will have its canopy waving like a flag (flapping). We can see the difference in the following image, where on the left the kite is out of the wind window and is ‘flapping’, while on the right, it is inside the wind window and the canopy is held straight and in tension by the wind pressure:
2. On the opposite side, if we are deep in the power zone the kite will push us and the kiter with a lot of pressure: we need to move upwind to get out of the power zone. You can see an example in the following image where the kiter and the launch assistant are struggling to hold the kite pull since its position is too deep in the wind window.

The compass method can be simplified as in the image below. It is needed to just check the kite behavior and act in the corresponding proper way:

If you feel too much pressure on your hands from the kite, you want to walk in the upwind direction until the pressure is reasonable, indicating the kite is correctly powered and ready to be launched.
On the contrary, if the kite is flapping and you have to hold it to keep it in the proper vertical position, it means you are too upwind compared to the rider position. You need to move downwind until the kite stops flapping. After that continue a step or two downwind to make sure the kite is properly engaged by the wind and has the needed power to be launched easily
An important note as launch assistant: when the rider gives you the thumb up (international launch sign) or any non verbal pre-agreed communication confirming he is ready, just let the kite go and step backward.
Many times people with the best intention push the kite up and forward:
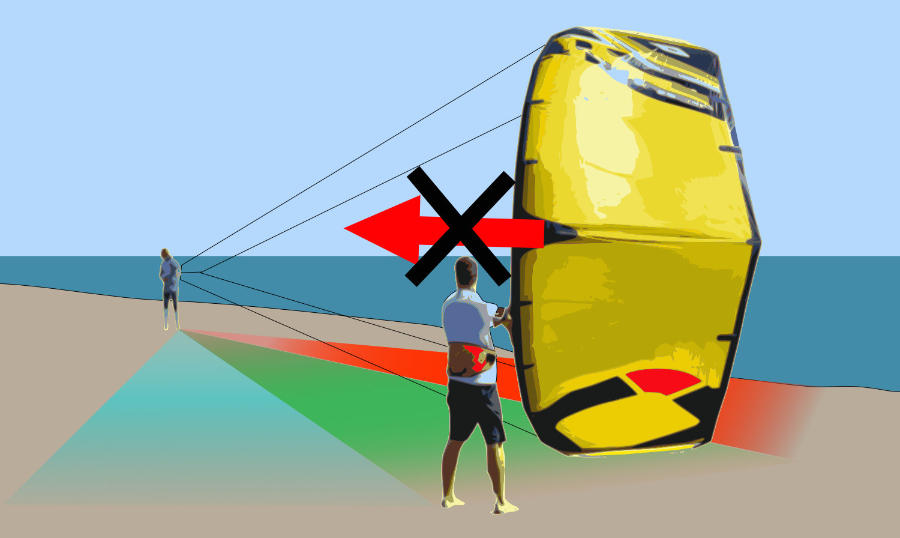
This is not a good practice, because the kite might go out of the border of the window (green area) to end up upwind (azure area) where we just explained it won’t fly and fall back dangerously in the power zone.
A little trick in the landing phase to ease the kiter and yourself is to catch the kite in the center of the leading edge and walk towards the kiter immediately before or while putting the kite from vertical to the ‘smile’ position.

In this case many times it happens that the assistant to the landing just flips the kite, pulling the lines and the rider. Normally it doesn’t create much of a danger. Yet it is uncomfortable for the rider who gets pulled towards the kite.
Of course, all that's written above is applicable if the pilot shows a sufficient level of capacity in the use of the bar, the correct sensitivity managing the line tension, and good control of the kite in prelaunch. if any doubt or misunderstanding arises during the launch or the communication between the pilot and the assistant is difficult, it is better to put back the kite on the ground and clarify the situation.
I hope this post will be helpful. Comment below with your impressions or if you have any suggestions or remarks on this topic, we really appreciate the contribution of everyone.