The Noble Art of Folding the Kite
The kitesurf session is over: how do you normally fold your kite? Here you can find different ways of folding the kite and a few tips to lengthen your kite's life
How to fold a kite is normally taught in the very first lessons during the kitesurfing training, often is a practice that any kiter giver for granted, but in reality, there are few different ways to fold a kite and here we want to talk about three of the most used.
Your session is over and you just deflated your kite on the beach or, if you’re lucky on a nice meadow which prevents your kite to remain full of sand.
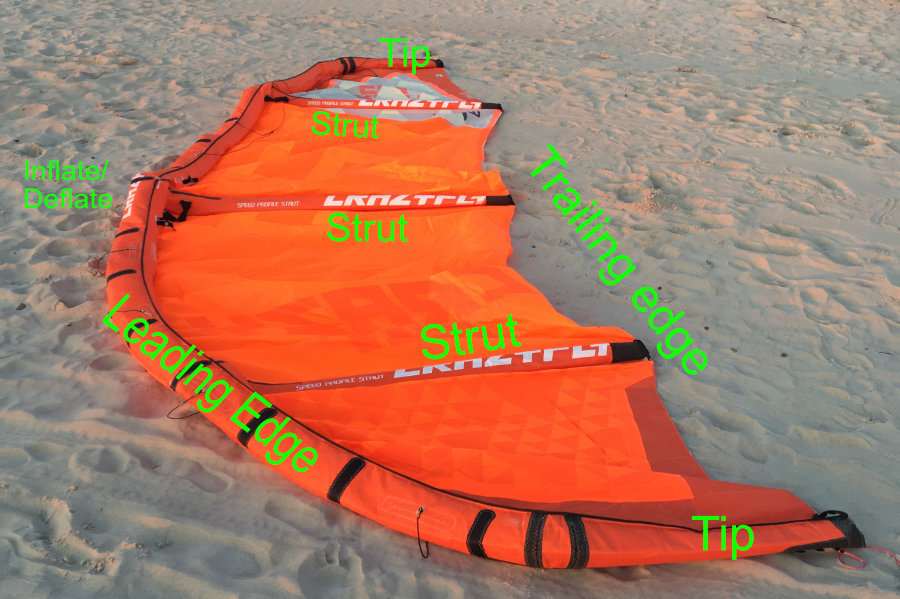
Before starting packing you want to make sure the kite is completely dry. Packing the kite wet even slightly can cause you some bad surprise later for example mold, deposits of sticky salt in the pleats of the kite, or some bad case color degradation of the canopy. If you are unable to get the kite dry and must pack anyway, make sure, once at home, to open again the wing and have it properly dried.
The other very important precaution is to leave all the valves open when the kite is packed to prevent their rubber structure to deform in the time due to the continuous action of the plug. This will lead to air leacks directly from the valve's nozzle, forcing to change it. Nowadays modern kites have replaced the classic rubber valves with plastic screw caps to avoid this inconvenience, but the siggestion is the same: let's fold the kite with them open.
Said so, if you are in a situation of strong wind, you want to align the leading edge of the kite and the trailing edge in the direction od the wind and start folding it from the tip you are holding the kite with (upwind). This will ease your kite packing because the wind will keep the kite straight on the ground.
METHOD 1
The first kite folding method is the most classic and I consider it the best practice.
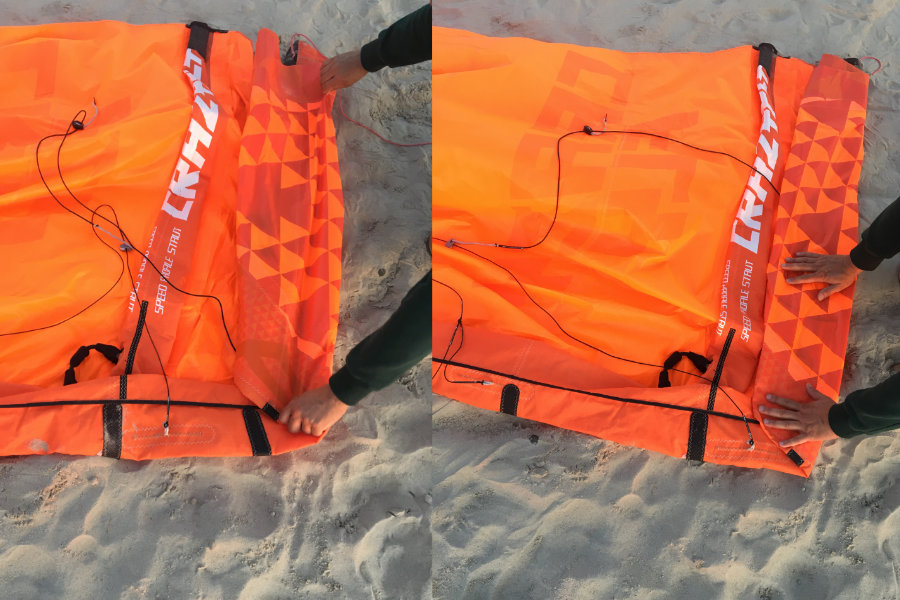
I normally start folding the tip in around 5 inches (15 cm), to keep them nice and flat. If you are particularly efficient you can arrive close to the struts and their one pump systems large enough to keep them in the same flat fold.
This can help to reduce the deformation of the connection and the valves. In the long term limiting the mechanical distress on these elements will significantly lengthen their durability. Especially the valves will unglue way less in the time.
A good precaution is to always try to slightly shift the position of the pleats to prevent the canopy to suffer being bent always in the same place.
You can see in the following image the particular care is worth to use in proximity of the struts and the one pump systems to arrange all the best possible.
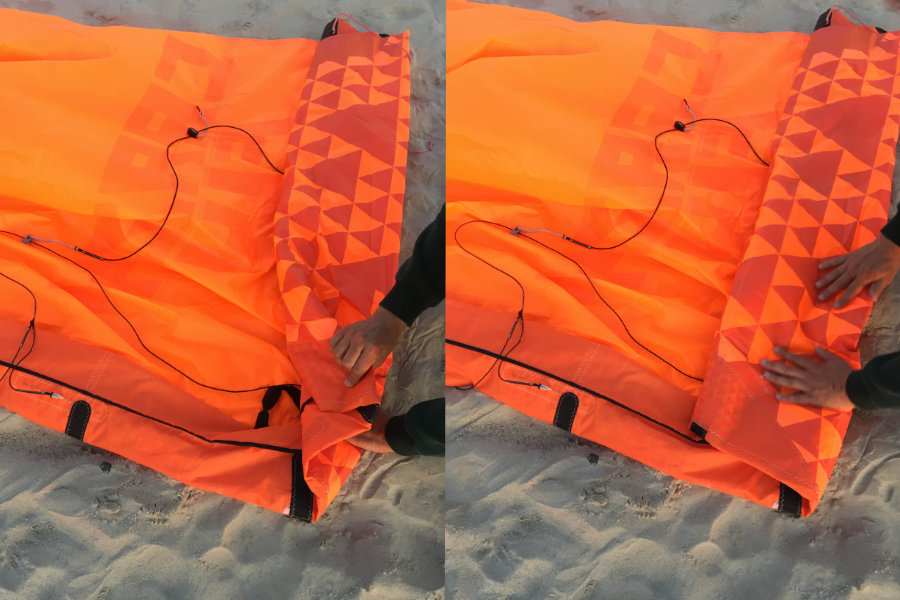
The use of this kind of care is especially advisable when a long time in the kite bag is expected (end of the season or the vacation). In that case, it is also very good to pay more attention to empty the struts and the leading edge from air residue: this will let pack the kite way more compact and easier to slide in its bag.
Notice that continuing rolling up the kite this way will increase the size of the fold, keep in mind you want to have the final rolled kite not larger than your bag size to easily fi it.
Once with both sides rolled up you reach the center of the leading edge, it is good to pay the same attention and fold the flatter possible the inflate and deflate valve system, exactly as it was done for the other one pump elements.
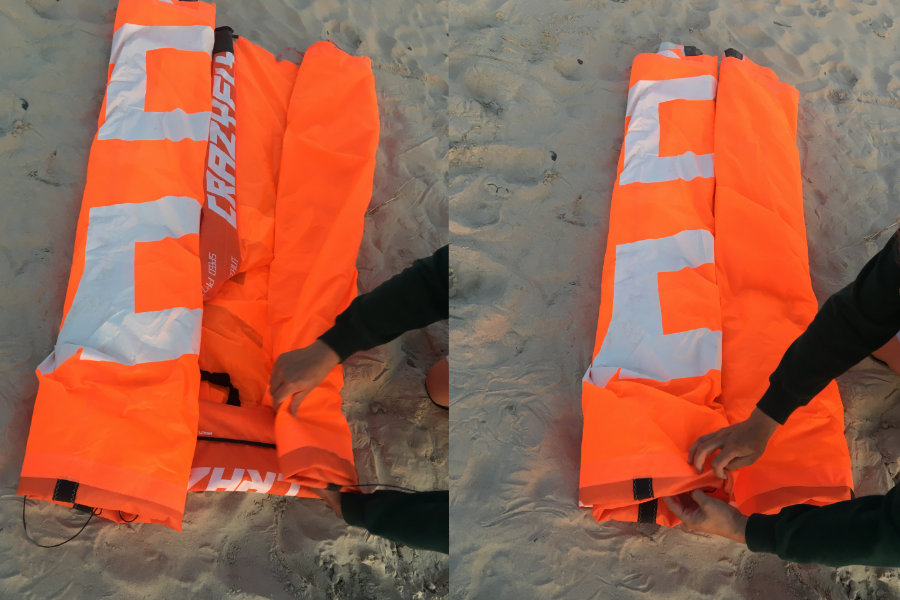
When this is done, the last easy step is to fold in the perpendicular direction the kite to fit it in the kite
bag. If it was paid good attention to emptying all the air from bladders and on having nicely flat-folding, this
operation would be swift and easy. On the contrary, if some air is still present in the kite’s bladders,
the final package will seem somehow way bulkier.
Some even use the deflate set up of the kite pump to make sure the bladders are completely empty, others press
on the struts and make them as flat as possible.
A good precaution in this last phase is to limit the folds to 1 or 2, that will be way more gentle to the
kite's fabric.
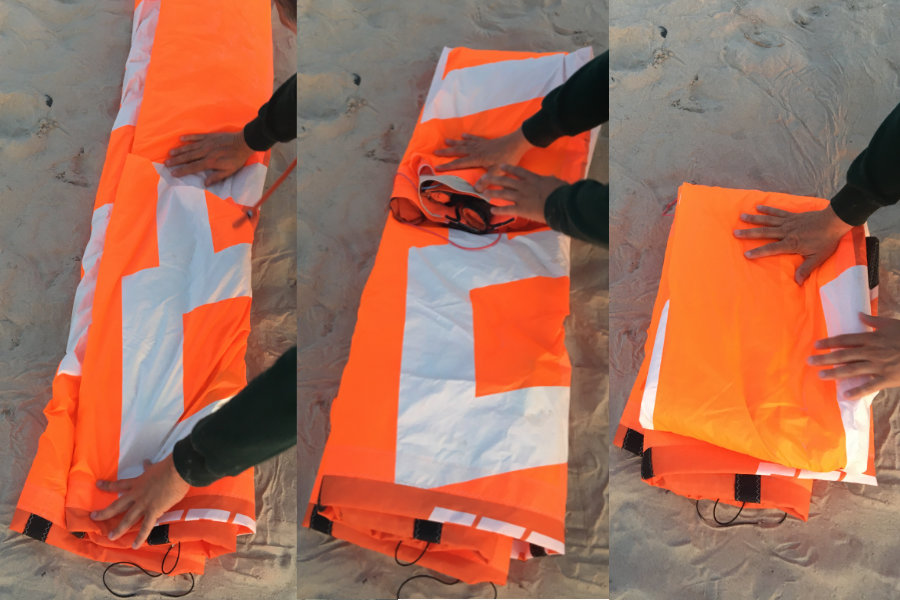
As said, this is the most classic way of folding the kite and how manufacturers package the kites for the storage and the sales.
But let’s say you need to pack fast to leave fast the beach (rain is coming, you are late, etc.) a faster version kite folding could be done with the:
METHOD 2
Instead than folding the tips separately and nicely, you can overlap one-half of the kite to the other and roll them up together. If you have an assistant, this folding can be done even standing without the kite touching the ground and getting dirty.
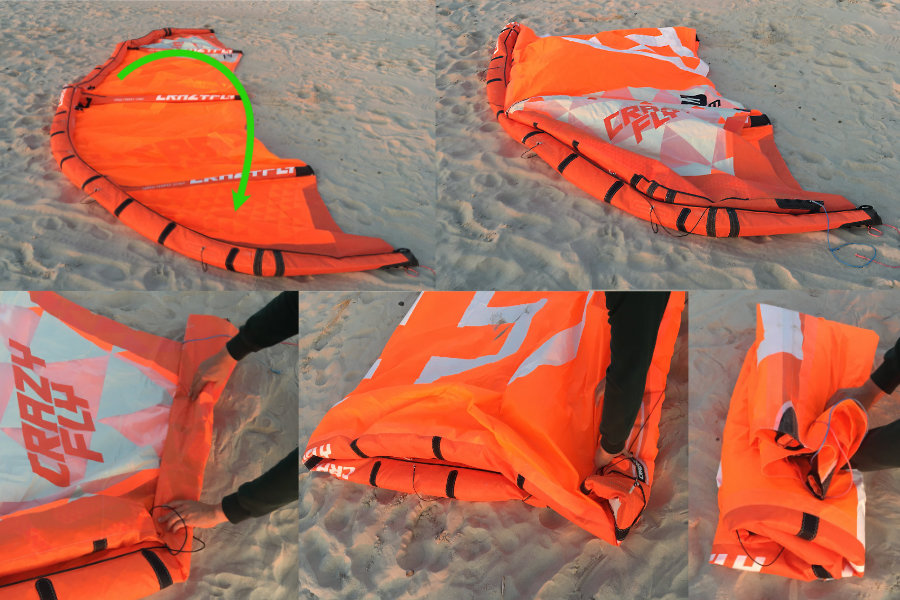
Imagine you have no time or the kite is still wet and you don’t want to bring home a heavy and dirty sand-pan-fried kite, that is a great way to go.
Safe to say once at home you want to outstretch back the kite to clean it and fold it properly as did with the METHOD 1
Another way to folding the kite which is very common to see on the kite spots in the
METHOD 3
This way of folding isn’t very different from the first one. The main change consists in rolling the kite from the tips, instead than folding it in flat sections as can be seen below:
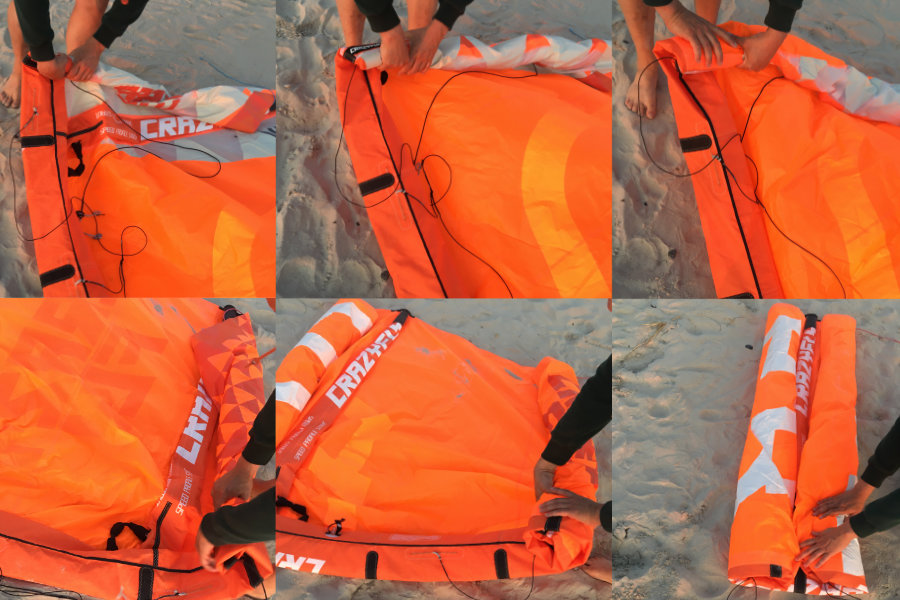
This method empties all the bladders from air and squeezes the kite to its maximum. As it is clear from the images, this configuration is more compact then in the previous methods.
Said so, I am not a fan of it, because it causes all the piping and valve systems to undergo heavy stress. Not by chance, in old kites this can often cause leaking form the inflating valves forcing the unfortunate kiter to re-glue them back.
So, how do you fold your kite? Did you find the topic interesting or too basic?
Let us know in the comments below what you think and if you have a different opinion on how to do this routine.

Travel Mug
Logo: Peace Balance Wind
Promote your Kite School for free!
Index your Kite School in our database.
You will get free lifetime visibility on Kitesurf Culture website.
If you have a website, it will provide precious backlinks to improve your SEO ranking
Relevant Posts
Are you a good assistant during a Kite launch and landing?

Line Managers: the New Way to Quickly Set Up Your Kite. True or False?
The Kitesurf session ended: tips for Kite Gear Maintenance

How to Avoid Kitesurfing Equipment Transportation Fees by Airlines
Get free Kitesurfing Resources and Tips
If you like our content and you want to be informed on the next blogposts release, please subscribe here. That will also help us to continue to provide quality content:
Give us your opinion.
Comments
Bragon
My kite has a dump valve at one end. I roll most of the kite from one end and try to keep it rolled lightly. The more space it takes in the kite bag the better.
5 years ago
Computer Backpack
Logo: Kitesurfing: making gravity optional since 1977
Promote your Kite School for free!
Index your Kite School in our database.
You will get free lifetime visibility on Kitesurf Culture website.
If you have a website, it will provide precious backlinks to improve your SEO ranking
Relevant Posts

Are you a good assistant during a Kite launch and landing?

Line Managers: the New Way to Quickly Set Up Your Kite. True or False?

The Kitesurf session ended: tips for Kite Gear Maintenance

How to Avoid Kitesurfing Equipment Transportation Fees by Airlines
Steel Water Bottle
Logo: Yoga Kite Love
Latest Posts

Kitesurfing Dubai: an honest guide. Tips, Spots & Winds

Unwind and learn: best beginner kitesurfing spots worldwide
Self-Rescue in Kitesurfing: A Crucial Guide to Safety

Kitesurf Ometepe: an Epic Kite Trip to Nicaragua

Kitesurfing Spring in Andalucia: Unexpectedly Great!