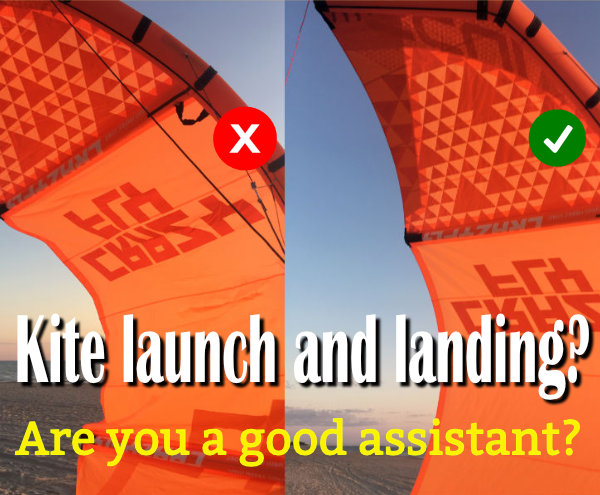
12 Tips to Correctly and Safely Launch and Land Your Kite
Let’s start from the basics: you are just fresh out of a kitesurfing course and you want to start your independent session. Let’s refresh the main safety procedures.
Often, we can see in our kite spot several kitesurfers who aren’t trained enough and keep repeating mistakes in the launch/landing stage, ending in unsound and clumsy failures. These can raise hilarity at the moment, but they should be considered serious hazards and treated properly since they can involve not only the riders but any bystanders.
It is always advisable reviewing the proper techniques.
Launching the kite.
1. Set up is the first step to start the launch procedure in the best way. Without going into details about the specific process, you want to make sure you followed two main guidelines:
a) you connected your lines downwind from your kite, so, when handling the bar prelaunch, you won’t end up having your kite directly into the power zone from your position. This is quite important to prevent involuntary kite take off in the most dangerous position related to yours.
b) You run a pre-flight check on the recently connected lines, by staying downwind and carefully pulling each of them making sure they aren’t tangled on each other and they are properly connected.
c) make sure you have no obstacles or people downwind to your position for a reasonable distance.
d) make sure you have no obstacles upwind your position, to avoid turbulent and unpredictable wind, which will make your launch very difficult and dangerous. The kite will behave in a very unresponsively and nervously to your commands
2. To perform a correct launch, you need an assistant to help you checking all to be right and properly support you, holding the kite correctly. If he is an experienced rider the better, if he isn’t you have to make sure he is properly trained to help you. He must know how to hold the kite in the center of the leading edge, the ‘smile’ position of the kite while waiting for you to get ready, how to hold it vertically and raised from the ground when you will put in tension the lines and, how to put it down in the rest position in case of an interrupted launch.
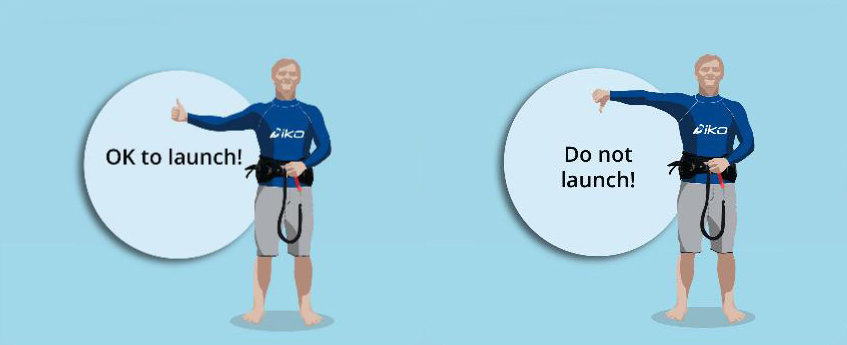
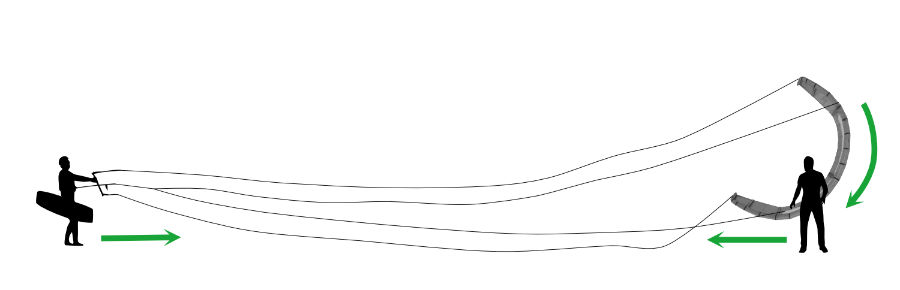
Then you need to agree on some non-verbal signs, at least 2: ok, launch and stop, abort the launch. Internationally the thumb up is equivalent ok launch and the thumb down means abort the launch and put back the kite in the rest position. Borrowing from IKO great international signs illustrations:
If you are in special conditions where you might not be able as a pilot to move up and downwind easily and it is advisable for some help from the assistant in moving and finding the window border (see point 4 below), you should still need to be the one in charge. To do so, you need to agree in a couple of more signs to be able to tell him to walk more upwind or downwind as needed.
3. Now it is time to connect your safety leash to the proper emergency line and then hook your bar’s chicken loop to your harness.
Before you do so, you must check your quick release systems to be perfectly operational and not clogged by sand, salt, or anything else, by activating them if it is necessary.
In case of an emergency, you can’t afford to find yourself in a situation where you have a clogged safety release!
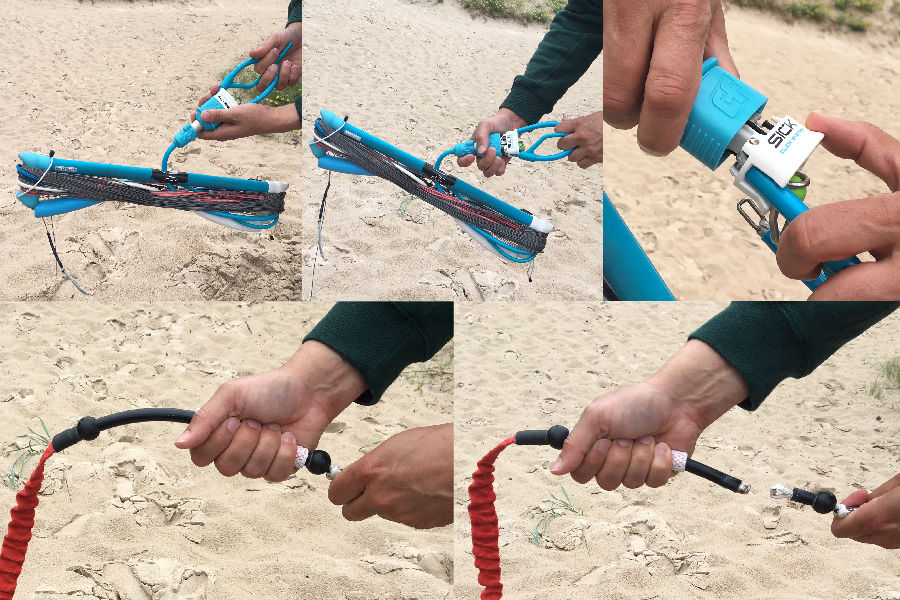
If both the bar and emergency leash releases are perfectly operational, you can proceed to connect them. Remember to check that the chicken loop finger is properly put to avoid unwanted unhooking.
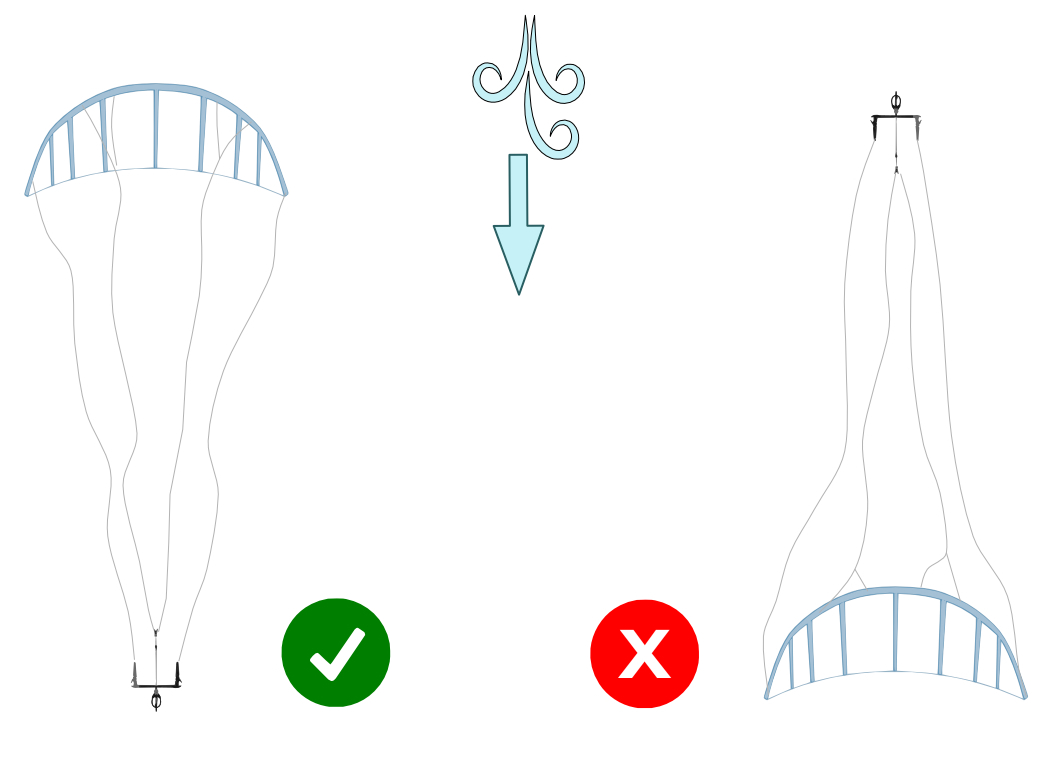
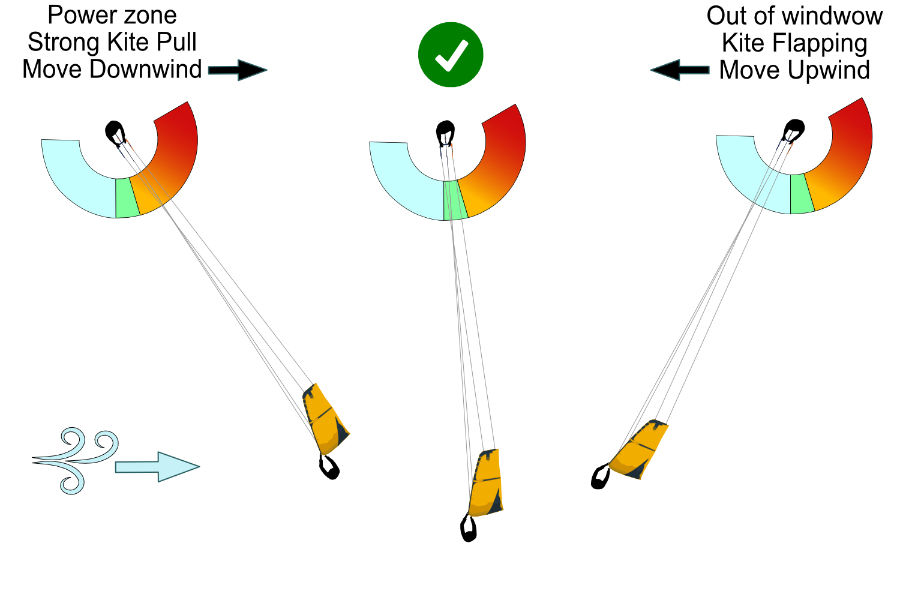
4. Find the proper position of the kite in your wind window. The border of the window is the place you need:
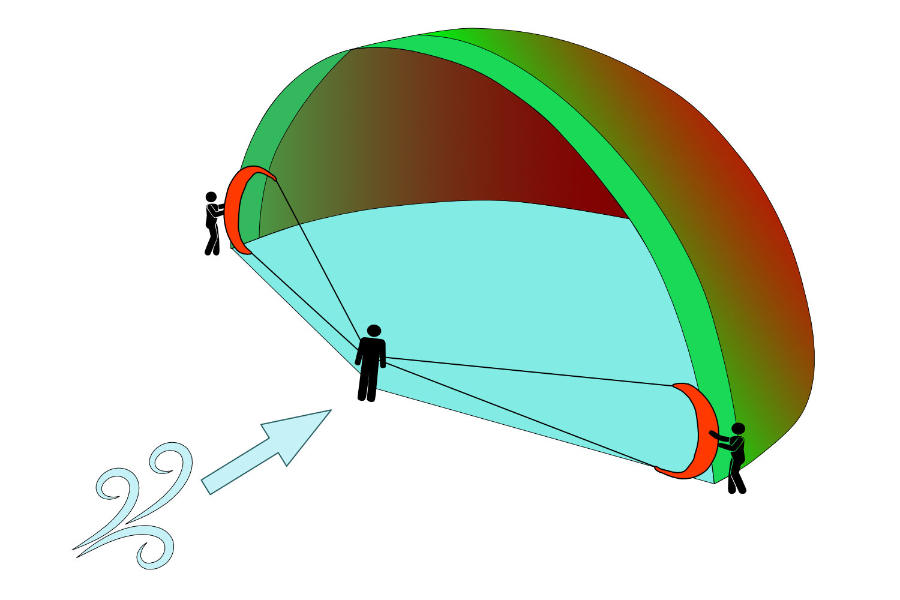
How to reach it is fairly simple, since you are coming from downwind (that is where you set your bar and lines), your position compared to the kite is such as the kite is out of your fling window and upwind compared to you.
Reach a position where the lines are about perpendicular to the wind and start gently put them in tension, while your assistant, who was waiting with the kite in ‘smile’ position, starts to adjust the kite position according to your traction, raising the kite vertically.
IMPORTANT: put the line in tension before you walk upwind from your kite, otherwise you won’t know if you are properly engaging it in the wind and you might even go too upwind, putting the kite in the power zone. The moment you then will put tension in the lines you will have a strong pull from the kite!
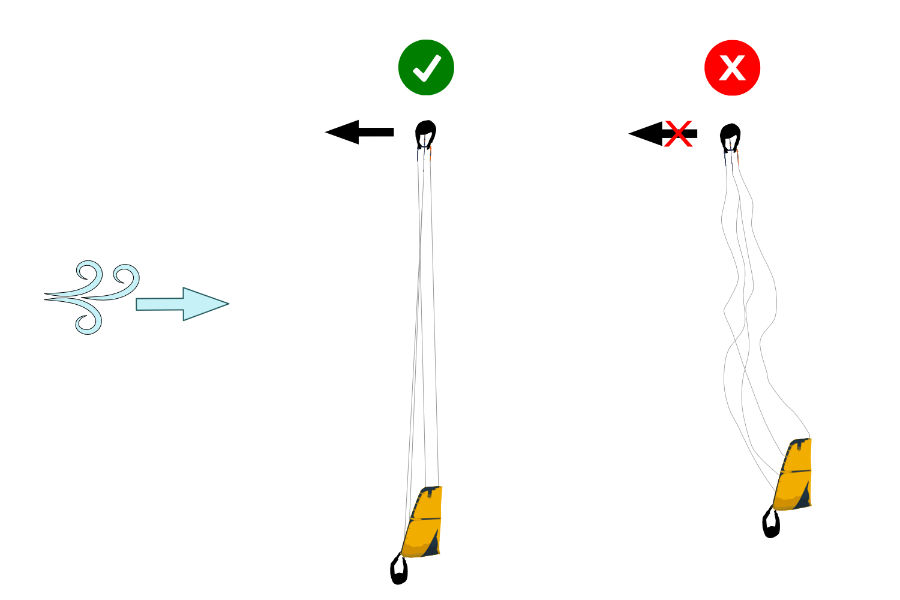
You will notice the kite probably will still be flapping like a flag without producing any tension on the lines while they are still perpendicular to the wind. Keep walking upwind and when the kite will enter in the wind window, it will stop flagging. You will start to feel a light pull from the kite. Proceed upwind a step or two more to make sure the kite is properly engaged by the wind to be able to fly.
Many suggest to stop immediately when the canopy stops flapping, but it is bad advice since you will be very close to having the kite out of the wind window and a bad release from the assistant could induce your kite in a back stall. As said two steps more upwind and this problem won’t happen.
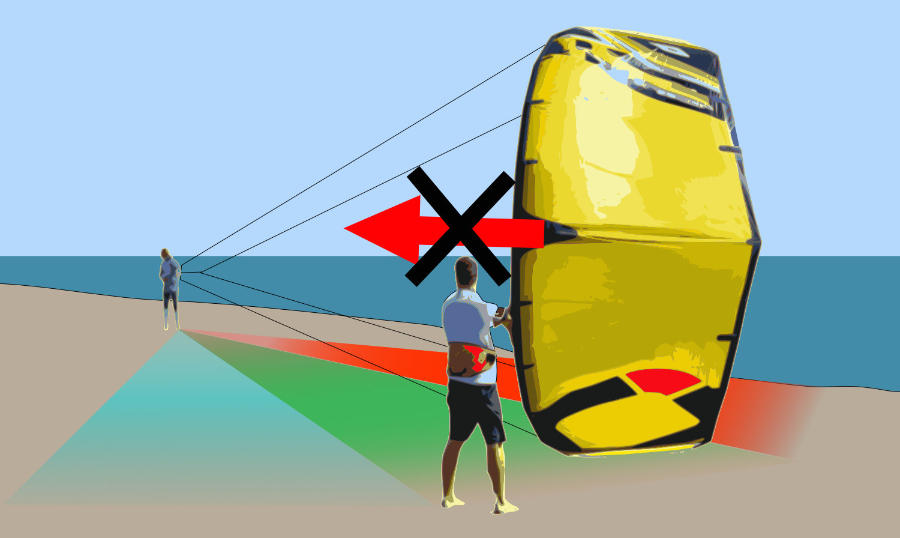
If you involuntarily will continue walking upwind, you will start putting the kite, in regard to your position, closer and closer to the power zone. You will see a progressive increase of pull from the kite, while your assistant will start struggle holding the kite in the proper position. Go back a bit downwind to ease the pressure and having back the kite in the border of the window.
IMPORTANT: don’t launch the kite from or close to the power zone, which will result in a sudden start with a strong pull on you towards downwind.
5. Once in the proper position, take gently the bar and start steering the kite up, once you see the proper response of the kite and all lines are clear with no tangles, give the assistant the sign to release the kite.
6. Continue to steer the kite slowly up, until you reach 45 degrees and then proceed safely to retrieve your board. The stronger the wind the gentler has to be your action, in order to prevent loss of control on the kite.
7. Retrieve the board paying the maximum attention in avoiding involuntary actions on the kite bar. Very often kneeling to take the board, having one hand on the bar, results in accidental bar pools which might lead to tragic consequences. When safely retrieved the board, head straight to the water to enjoy your session.
Landing the Kite
8. Finding a rider on the beach willing to help to land your kite by using the international sign of tapping your head. In response, the assistant should acknowledge by tapping on his head and raising the opposite harm. Here we borrow again from the very good IKO illustrations:
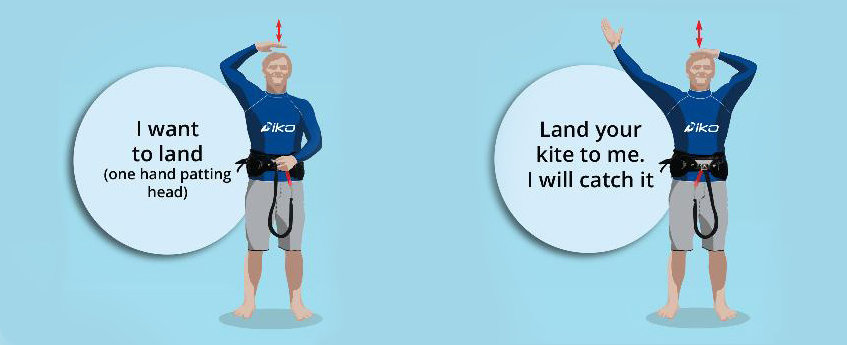
Some just answer with a thumb up though. As long as you both clearly understand each other it should suffice. Unless you know the rider, remember the assistant might be not so experienced, so pay extra attention.
9. Bring the kite down slowly with a moderate tension on the bar, enough to properly steer the kite gently.
10. As soon as the assistant catches firmly the kite, completely depower the bar, letting go the bar only when you are sure the assistant has full control on the kite.
11. Once the kite is safely in the hands of the assistant, quickly walk towards him to slack the lines and cut off any power from your kite.
12. Wait for the assistant to secure on the ground the kite, double-check the kite is safely put, detach bar and leash from your harness and wind the lines on the bar.
Some notes on good practices and mistakes for the rider and the assistant.
Rider.
- If you are not so experienced, consider launching the kite being yourself in the water at least knee deep, this will avoid you being dragged on sand or worse stones in case of mistakes in steering the kite.
- Make sure you give the ok to the launch when the kite is not flapping out of the wind window or it is too deep in the power zone.
- If the wind is light avoid overpowering the kite. This will back tall the kite, read here for more info. In this situation is better to put the kite slightly deeper in the power zone (few steps more than normal upwind after the flapping stop) avoiding using the bar depower, but just steering the kite up rapidly once released by the assistant.
- A rider can ask a non-kiter to assist him, though the responsibility to make sure the assistant has enough information and gets properly trained is the pilot's unique responsibility.
The rider should make sure to avoid trying to find the border of the window without the proper tension on the lines. When he’ll put back tension in the lines, it might lead to launch directly from the power zone, with very bad outcomes.
- Double-check if you have in your hand the bar on the proper side. Inverted bars in the hand make it impossible to a rider the control of the kite. That would have catastrophic results.
When landing you should not expect the assistant to run after the kite out of control, but make sure you deliver the kite gently the closest possible to the assistant’s position.
Assistant.
- Never throw or push the kite upwards. The rider will maneuver it. It is required just to simply hold the kite firmly and let it go when the pilot gives the thumb up.
- Never hold the kite too close to the wing tip since the control will be very difficult and the kite might get out of control.
- The assistant should not put himself in front of the kite, but behind it, out of the wind window.
- The assistant should move only if agreed with the pilot or in case the kite is dangerously in the power zone, in that case, he could by walking towards the pilot and cut the tension on the lines.
- The assistant should not let the kite go if an unexperienced kiter gives the ok signal when the kite is still flapping out of the flying window.
- Similarly, the assistant should not let the kite go if he sees any tangles in the lines or the bridle system.
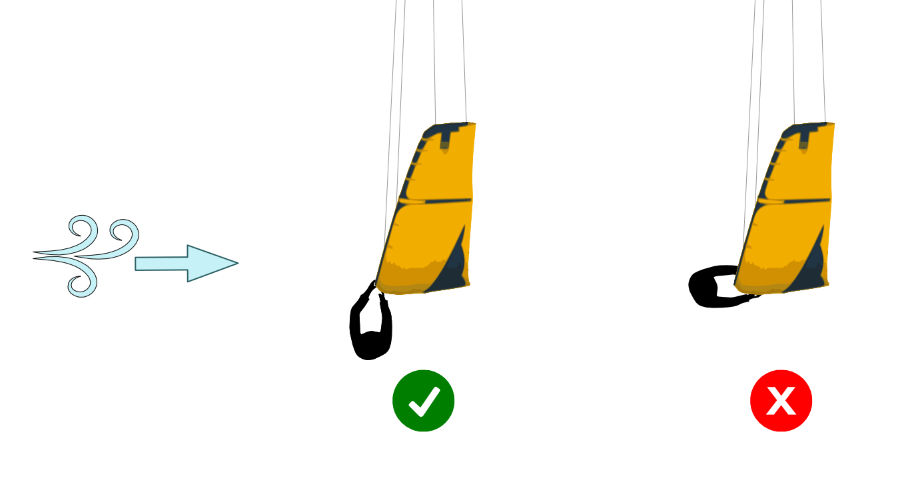
- The assistant should hold the kite raised enough form the ground to avoid the canopy to get partially engaged by the wind.
Well and this is all for now. For sure the topic is quite delicate and complex and we might have missed some details in our post.
Please say what is your opinion about this and if you agree with all what's written or you have different ideas on the matter, in the comments below.

Toddler Premium T-Shirt

Logo: When life gives you wind go kiting
Promote your Kite School for free!
Index your Kite School in our database.
You will get free lifetime visibility on Kitesurf Culture website.
If you have a website, it will provide precious backlinks to improve your SEO ranking
Relevant Posts
The Noble Art of Folding the Kite
Are you a good assistant during a Kite launch and landing?
Guess what?! Kitesurfing right of way rules!
How To Overcome The Fear Of Kitesurfing

8 Simple Tips to Safe Kiteboarding
Get free Kitesurfing Resources and Tips
If you like our content and you want to be informed on the next blogposts release, please subscribe here. That will also help us to continue to provide quality content:
Give us your opinion.
Computer Backpack

Logo: Kitesurfing: making gravity optional since 1977
Promote your Kite School for free!
Index your Kite School in our database.
You will get free lifetime visibility on Kitesurf Culture website.
If you have a website, it will provide precious backlinks to improve your SEO ranking
Relevant Posts
The Noble Art of Folding the Kite
Are you a good assistant during a Kite launch and landing?
Guess what?! Kitesurfing right of way rules!
How To Overcome The Fear Of Kitesurfing
8 Simple Tips to Safe Kiteboarding
Contrast Coffee Mug

Logo: Kitesurfing making gravity optional since 1977
Latest Posts
Kitesurfing Dubai: an honest guide. Tips, Spots & Winds
Unwind and learn: best beginner kitesurfing spots worldwide
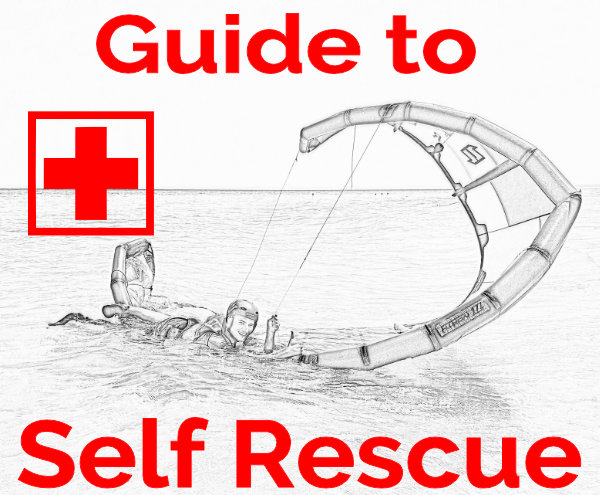
Self-Rescue in Kitesurfing: A Crucial Guide to Safety

Kitesurf Ometepe: an Epic Kite Trip to Nicaragua

Kitesurfing Spring in Andalucia: Unexpectedly Great!